by Naam
Note: This manual has been written for the previous version of ChanLum. Concepts and parameters are the same, but interface images may be deceptive :)
v1.000
ChanLum is a small experimental shader. It uses a different method to calculate the illumination of a surface, providing some interesting effects. It can be used to simulate (mind you: simulate!) Sub Surface Scattering as well as surface fuzz.
Index The simple idea behind it The reason why I wrote ChanLum was in the first place to see if I could find some method to create surface fuzz, as seen on a peach for example, or on some types of skin, where the surface has a small layer of thin fur. My idea was to write a shader that simply simulated a thin layer of a fog-like material on the surface. Let me explain.
The above picture illustrates what happens when a normal surface gets rendered. The renderer is rendering point P on a surface. It does this by measuring the angle between the surface and all available lightsources (a). It then uses these angles in an algorithm like Phong or Oren-Nayar to decide how the surface should be shaded at that point, given the lighting.
In the case of fog, however, there is no surface normal present. The renderer simply measures the lightsources directly, possibly taking into account shadows (in case of volumetric fog).
The idea of ChanLum is to use this way of gathering light on the surface of objects instead of fog. To keep calculations as fast as possible, the shader simply offsets the actual sample point (S) by an offset (O) along the surface normal. The size of O defines the thickness of the virtual fuzz-layer.
By using this offset, ChanLum allows light to 'creep around corners' so to say. As seen in above picture, even though the sampled surface point is actually in shadows, even on the dark side of the object, it does receive Illumination because at that point the fuzz-layer isn't in the shade at all. This was the basic idea how it should work, but it doesn't stop there. Because when you shade an object like this, the border between lit fuzz and unlit fuzz is very sharp, which just doesn't look right.
That's why ChanLum also allows for a 'spread-out' sample. This can be acheived in two ways. The first method ('Along Normal') is illustrated above. The sample is actually an average sample of the area S (the rectangular space). In other words, ChanLum simply takes a set of fog-samples along the surface normal, not further away from the original (offset) samplepoint than radius r. This both smoothes out the transition from bright to dark, as well as it allows the light to creep along the surface even further.
When combining this type of lighting with a fresnel effect (above), I get exactly the effect I was aiming at, a fuzzy, velvet-like appearence of the object that correctly attenuates for shadows.
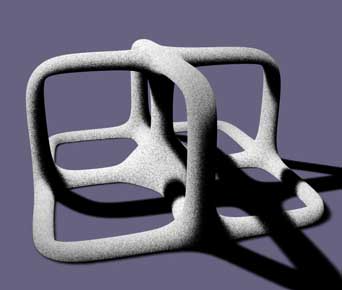
The second method to take a spread-out sample is to measure the average sample of a spherical area S with radius r. To do this properly, ChanLum needs to take random samples within this area, hence the result is noisy. This method not only makes the transition smoother, but also gives the object another interesting appearance. This is especially apparent if you increase the sample radius and add a highlight (see below).
Not only does the shading creep around corners, it seems to be generated by the inside of the object. Only where the object is a lot thicker than the sample area radius does the shading really get darker, simply because when the object is thinner than the radius, there will be samples taken from the other side of the object, where the object doesn't cast a shadow. This effect, when applied well, comes close to Sub Surface Scattering, though it is something entirely different. Nevertheless, it makes for a great wax shader, and when used moderately can be used to make surfaces like human skin much more realistic thanks to the light-creeping and the softening of shading.The Settings
If that was a clear description, the settings should be no problem anymore. I'll walk by them one by one nevertheless.Samples
This is the amount of samples ChanLum takes in the area, be it along the normal or within a spherical sample area. The first sample is always taken from the offset samplepoint. If you set ChanLum to take just one sample, the settings that don't make any sense anymore (like sample radius and type) are greyed out.Initial Offset
This is the distance between the original surface point that gets sampled (P in above illustrations) and the first sample point. This first sample point is a point in space along the surface normal.Sample Radius
This is the size of the area sample, in the illustrations above called r. A bigger radius generally means that you need more samples to get a smooth (read: low-noise) appearence.Sample Type
The sample type can be either set to Along Normal or to Area. If set to Along Normal, samples will be taken along the surface normal. This can be either a set of regularly spaced samples (if stochastic is turned off) or random samples anywhere along the normal, making for a noisier appearence. If the Sample Type is set to Area, ChanLum needs to take random samples within the area, so the stochastic option will be greyed out.stochastic
If this setting is turned on, ChanLum will take randomly placed samples for you. If it is turned off (only possible in the case of the 'Along Normal' sample type), it will take samples with a regular distance from eachother, leading to a smoother result with less samples.gaussian
This is an extra option when in stochastic mode. If it is turned off, the random samples can be anywhere in the defined area. If it is turned on, however, the chance of getting samples closer to the offset first sample point is much greater than getting samples further away. This generally leads to a more pleasent appearance. If you turn it off, you may want to decrease the sample area to get about the same effect as when it was turned on.shadows
Turn this option off to leave shadows out of the calculation. It is unadvisable to do this with the uses described above, because they simply rely on shadows for the whole appearence. But there may be some uses where you want to use ChanLum's fog-sample method without needing the shadows to be taken into account (like with particle sprites) so I simply built this option in.Manual
With this button, you'll be able to open up this manual.OK
Confirm changes and save them to the material being edited.Cancel
Change your mind and leave the dialog without the shader changing.Usage Color
To use the shader in a colored variety, simply define the color you want in the channel's Color section, and set the shader's 'Mix' to Multiply.Texture
To use ChanLum with a texture or combine it with another shader (like I did above with fresnel), you will have to use bhodiNUT's Fusion shader, put ChanLum in one of the two available channels, the desired texture in the other, and set Fusion's 'Mode' to Multiply.Example Uses
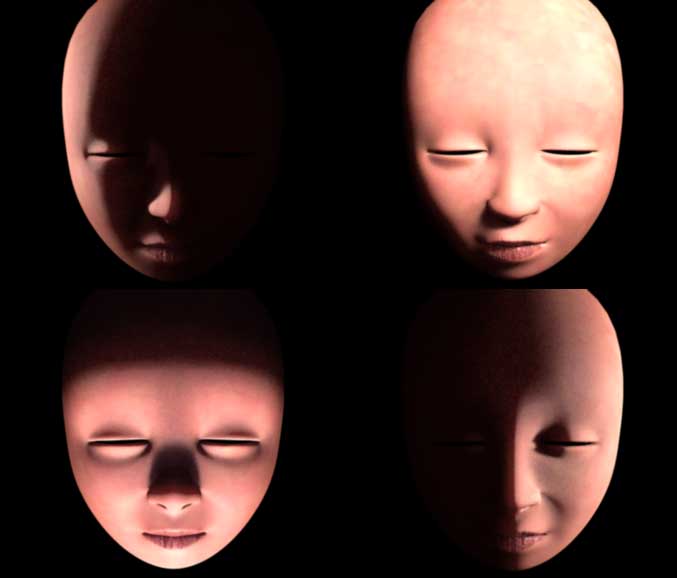
A face lit from different directions. ChanLum was used in the luminance channel, together with a noise-and-capilaries texture, and a fresnel effect to make the shader more apparent when the surface is viewed straight-on. Note the soft nuances when going from lit to dark areas.
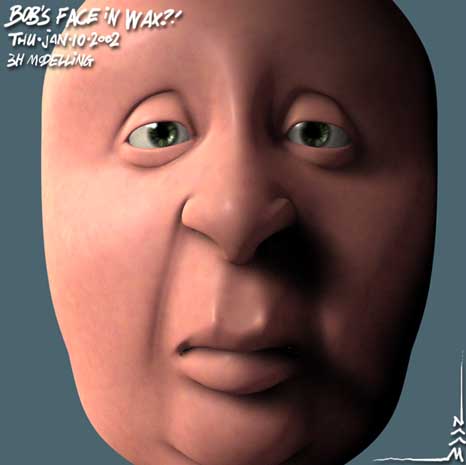
A somewhat more exaggerated use. The skin almost seems like made of wax here. ChanLum is used on the eyewhites as well.
In this render, ChanLum is literary everywhere. Most noticable is the skin, where a very moderate use of ChanLum (attenuated with a noisy, colored 'underskin' texture) makes the skin appear much softer and 'deeper'. It was also used on the hair, which is a simple collection of lofts. Because of ChanLum, it doesn't matter for the hair which direction the light comes from, it can just as easily be coming from behind, which is a lot like how real hair behaves. I used a very subtle fuzz for the collar and sweater, even put it on the teeth and eyewhites.
A little more experimental use of ChanLum, to make an object look like it has been cut out of rubber-foam.
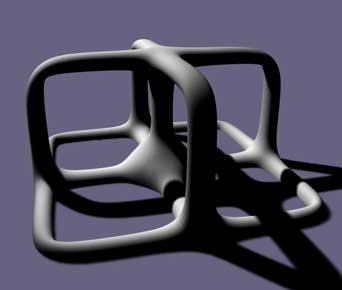
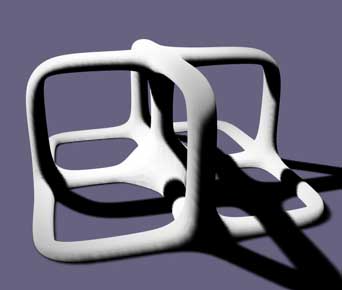
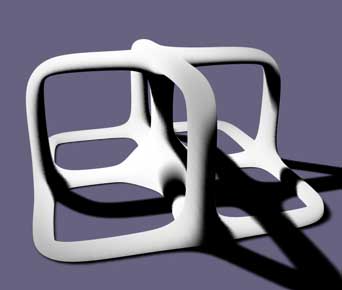
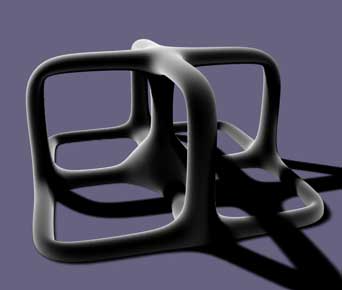
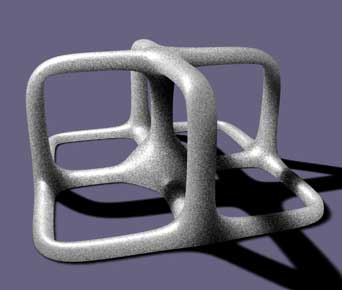
And to finish off a highly experimental use of the shader. This object is just a bunch of cubes and lights being emitted and deformed. The cubes get lit by the lights from the inside out. There's no shadows present in this picture, just falloff lights and colored cubes.Known Limitations Thanks to the way ChanLum does what it does, it needs shadows on all lights. If you add even one shadowless light to the scene, and it illuminates the object having ChanLum in it's material luminance channel, the effect will most probably be way too light.
Furthermore, the quality of the shadows has a big influence on ChanLum. Very soft shadows lead to a very soft appearence. High resolution soft shadows and hard shadows lead to much more noise when using the stochastic method. The soft shadow bias setting also influences how far the light creeps around corners.
Because currently ChanLum is written in c.o.f.f.e.e. and not in C++, it is quite slow. I must say I myself never used it to such an extend that I got really tired of waiting for the renders to finish, but I do catch myself trying to keep the sample count real low :).
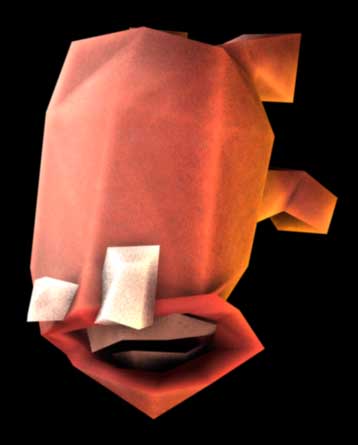
ChanLum tends to look facetted on low-resolution meshes. This is because all that ChanLum has is the actual point in space that gets rendered, whereas shading methods like Phong and Oren-Nayar 'pretend' that the surface is smooth and bent. There's no easy (thus: fast) way to battle this, save than to live with the consequence (which actually provides some very nice effects :) or use high resolution meshes where you can.
ChanLum also tends to be victim to self-shadowing artefacts when the Offset is kept small. This can lead to bands appearing on certain poly's, especially with soft shadows. Nothing much to do about this other than to raise the Offset, or use more samples or a bigger sample area.
Contact Naam, Happy Ship, Groningen, the Netherlands
email: naam@happyship.com
company site: http://www.happyship.com (You can find full contact details there)
personal site: http://www.xs4all.nl/~naam